

If you are interested on making a similar menu to mine. These are the things I used to make it possible.
- 11x14 frame
- Spray paint
- Metal sheet
- Scissors (cuts though thin metal)
- (2) 12x12 of same decorative scrap paper
- (2) 12x12 of different decorative scrap paper that goes with your color theme
- 12 plastic jars (I got 24 of these from ebay for 22.99)
- Mod Podge
- Foam brush
- (2) Clothespins
- Business cards
- (2) 16 ct crayon Cra-Z-Art boxes
- Magnet buttons (found them in the craft section of walmart)
- Hot glue gun
- Dry erase marker
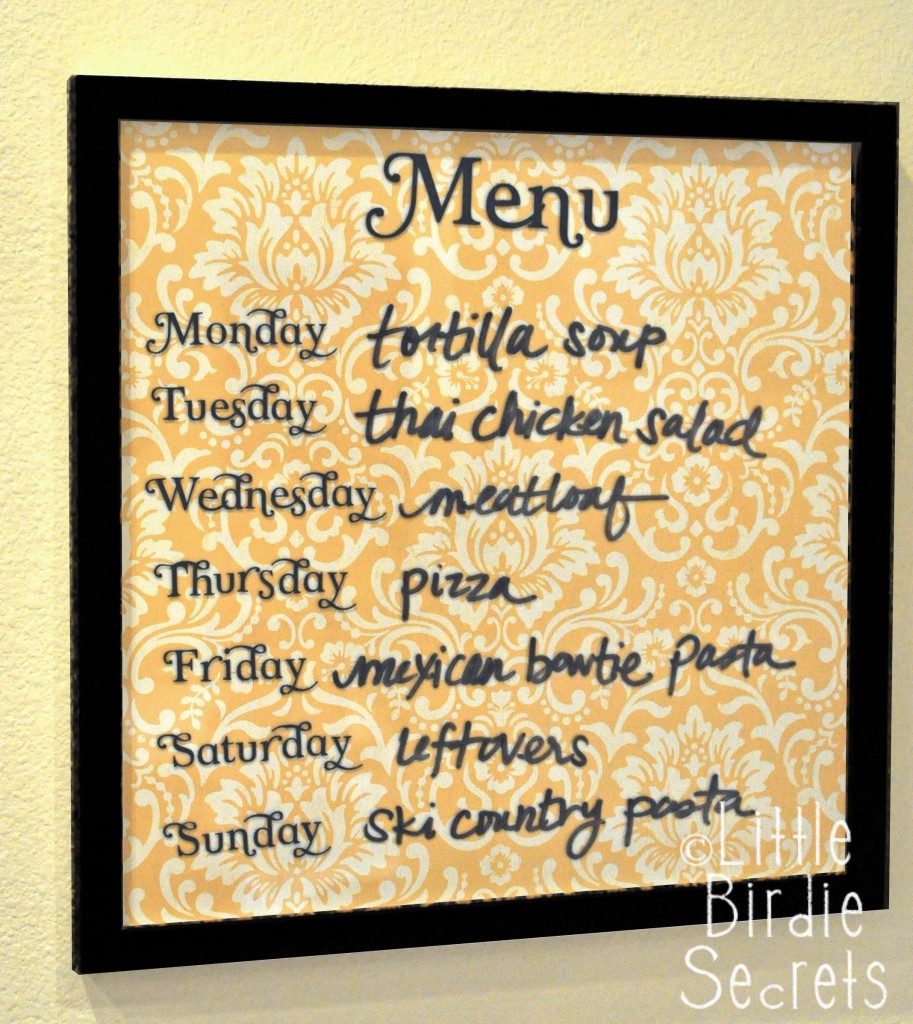
FRAME: The first thing I did was sand and used primer, after it dried I spray painted the color I wanted my frame to be, I used Krylon's (yellow) Bright Idea color and let it dry. Next, I used the glass from the frame to measure the metal sheet, used a sharpie to trace where I would need to cut and used scissors that can cut through thin metal.


METAL SHEET: Cover the entire metal sheet with scrap paper, you will need two 12x12's. You will use the one entirely and the other one you will only used a couple of inches to be able to cover the entire thing. Spread a thin coat of Mod Podge all around the edges of the metal sheet and make sure it has no bubbles or lines. Let dry, then use a different scrap paper to cut a straight to cover where the scrap paper overlapped. After dried, place the metal sheet behind the frame glass and close.
CRAYON BOXES: Cut the boxes until you can see the business cards. I cut roughly around 1/2 an inch. When you have cut to your preferred size, use Mod Podge and cover with scrap paper.
CLOTHESPINS: Cover with scrap paper and use a sharpie to write "Today" and "Week".


SPICE JARS: I used 12 plastic jars for this project and filled them up with my most commonly used spices. You can make your own labels like mine or just a sharpie and write the names of the spices on the lid. Turn them upside down and hot glue magnet buttons on to the jars (I used 3 for each jar). Put on frame.


BUSINESS CARDS: Using a pen or using the instructions from your business cards, on the front of the card. The name of the dinner and sides that you will be paring with the dinner. On the back of the cards write all the ingredients for when you are getting ready to plan your meals, you'll have a list of what you need to have in your fridge.


If you have any questions, please leave a comment and I will try to answer them as best as I can. Thanks for reading!


No comments:
Post a Comment