

I have always had a passion for crafting, but it wasn't until a couple of years ago that I really started to become passionate about my DIY's. That's when my craft supplies started to pile up. I had no organization for all my supplies and it became such a hassle to find anything in the boxes and laundry basket where I kept all my things shown above. I just knew I had to do something before I went crazy. Haha. I hope the "before picture" shows what I was dealing with, it was a complete mess!
The first thing I did was remove the unnecessary wood that was used to hold (nonexistent) shelves, this closet only had one shelf and I used it as a table to hold my sewing machine, that's what originally gave me the idea for the craft closet!

After I finished removing the wood, I painted the walls while my husband cut the wood for the shelves and glue my tabletop.


He used a piece of thin plywood as a base and glued (4) 1x4's on it for the tabletop. After a full 24 hours of drying and having some of the heaviest books I own sit on top (Star Wars and History books won, who knew?). My husband built the shelves for the tabletop to lay on top, and it fit perfectly. LOVE!


I stained the table with Minwax wood finish twice to get the darkest effect.


I will then prime the shelves with a white coat, then I finished it with a coat of my favorite Valspar pink paint! Don't they look so gorgeous?? :)


Next, I painted my pegboard with an ombre effect. I love how it turned out! I used three colors to make this possible. A dark color of blue, a lighter color of blue and white color paint.


**After this point I stop taking pictures of the process, SORRY! I will try to explain the best I can.**
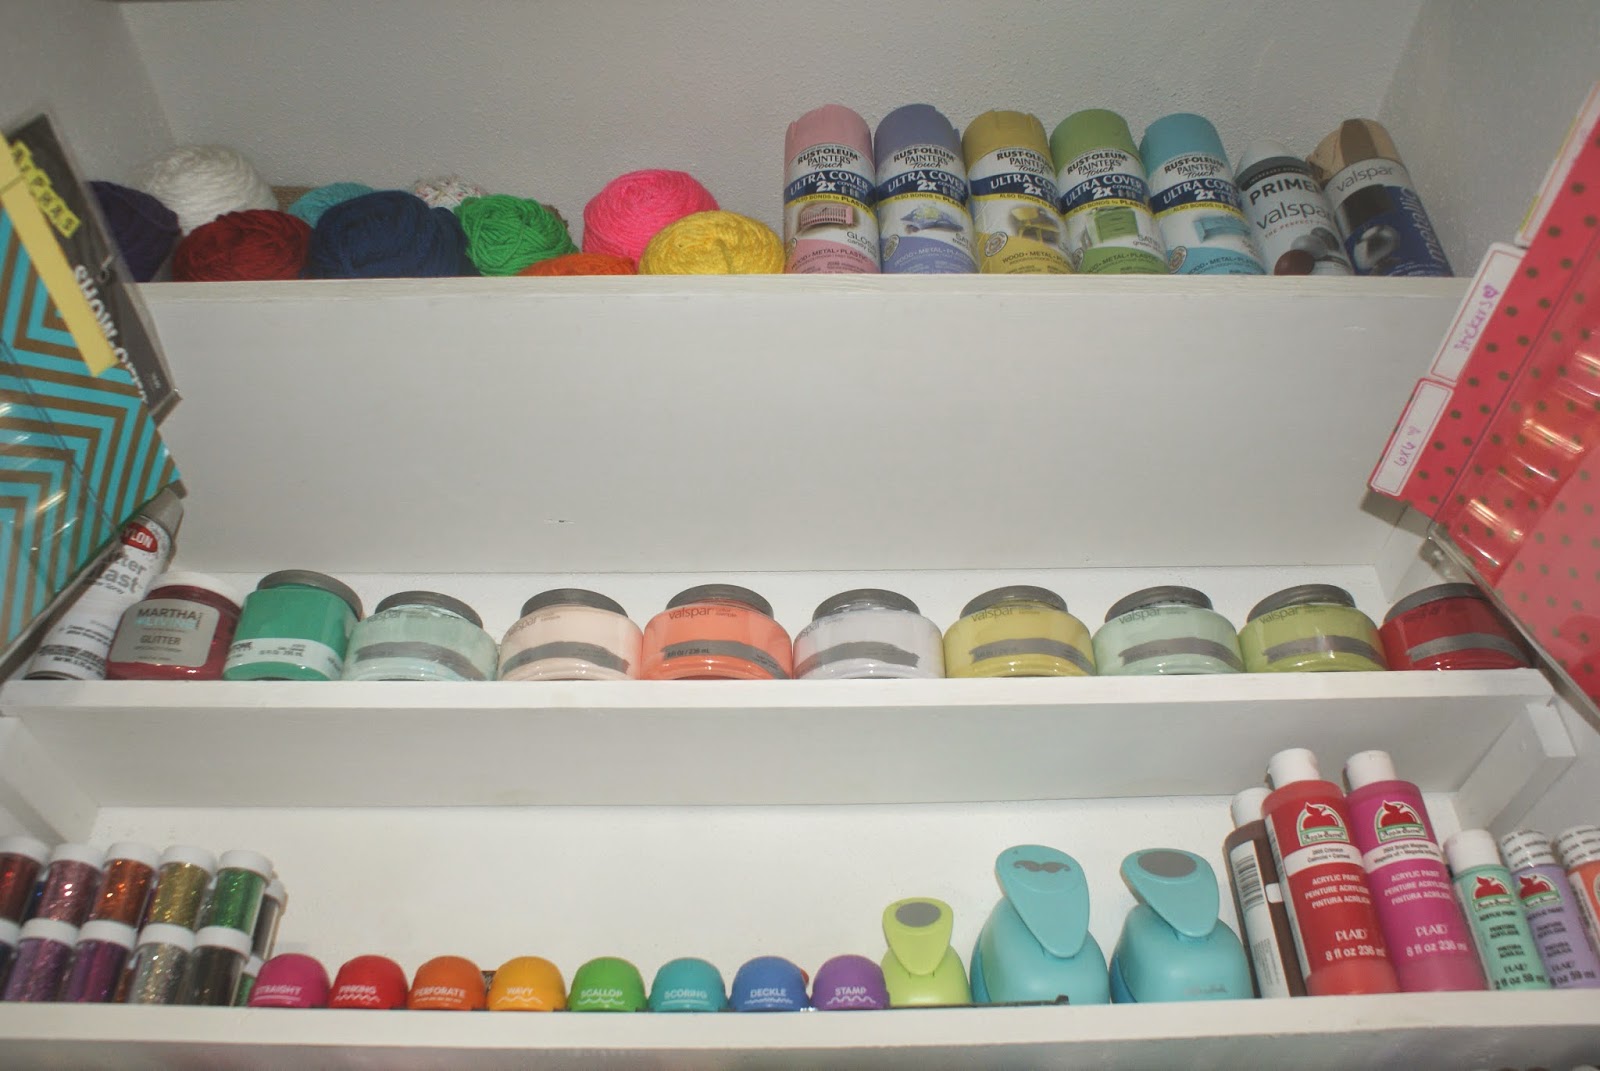
I wanted to have three top shelves to hold my craft items. The very first shelf is much wider than the rest because I wanted to store my yarn, spray paint and paint cans. The second and third shelf I wanted to store much smaller items so the shelves are not as wide. On the second shelf, I have small containers of Valspar paint from Lowes. On the third shelf I have craft glitter, paper cutters, and acrylic paint.
Next to the shelves are file holders where I store sandpaper, stencils, iron-ons, stickers, 6x6 scrapbook paper, and 12x12 scrapbook paper. I found a three piece acrylic file holder in Office Depot and the cute file folders at the dollar spot in Target.


I am using a tension rod that I bought from Kmart to display my pretty ribbons. I bought almost all my ribbons from TJ Maxx. They had a few packages of ribbons for a really good price!

Next, I used a pegboard to store most of my sewing essentials. I painted the pegboard with my favorite Valspar mint green paint. I LOVE IT!

Side views. :)


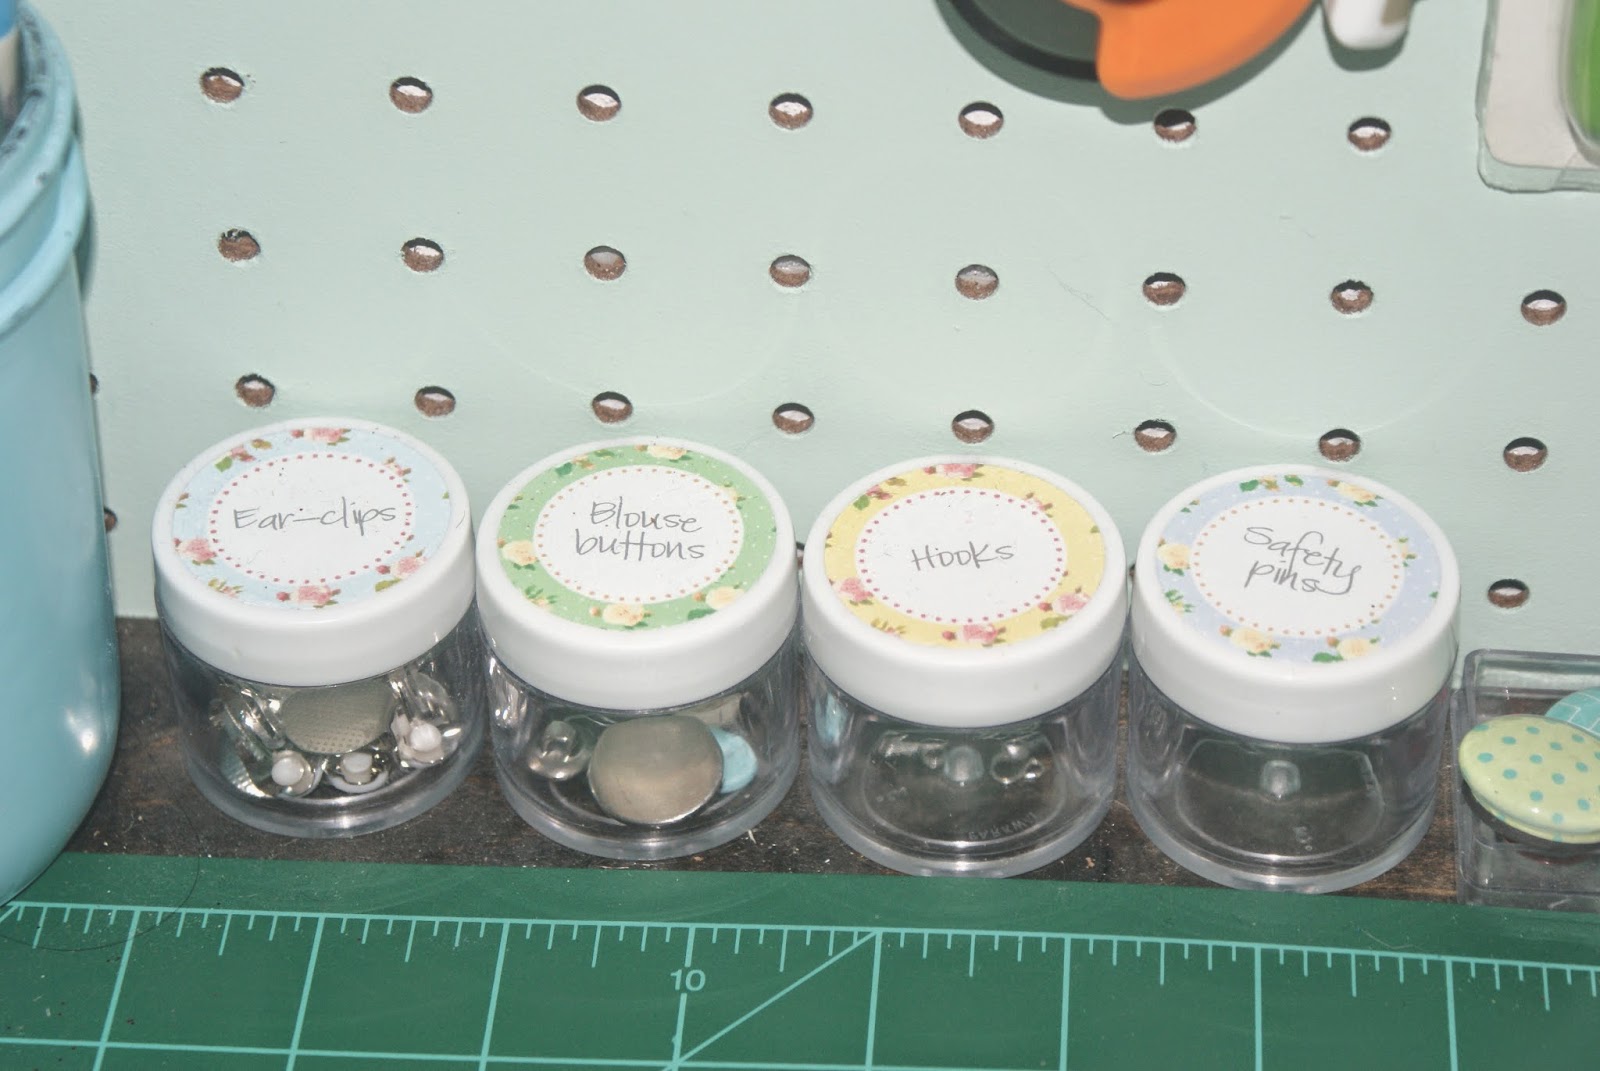
Next to the mason jars I keep ear-clips, my extra blouse buttons, hooks, and safety pins.

And right underneath I have a chalkboard with chalk to scribble lovely things.

On the right side, I have three frames that I made specifically for sewing.

The first two small frames I used floral fabric and stuffed it with polyester stuffing to hold the needles and pins.

The third frame I made it into a thread holder. I did this by using a piece of plywood to fit on the frame, drilled holes and glued small cut round sticks of wood at a slight angle.

The purple heart next to the thread holder I keep all my studs and spikes, snaps, pins, and jean buttons. I found this gem at a thrift store.

I bought my sewing machine at Walmart. It's the Brother Computerized Embroidery and Sewing Machine, SE-400. I absolutely love it! I completely recommend it if you are looking for a good embroidery and sewing machine.

Behind my sewing machine, I keep two small baskets to hold a some more of my thread and ribbons.

The shelves holding the tabletop is next. In this picture, I am demonstrating how I am able to hide the sewing machine wire underneath using command hooks.

I keep contruction paper here.

I keep large mason jars in the back with pompoms and rhinestones. The smaller mason jars contain magnets, pegboard hooks, and command strips.

I keep fabric scraps in the large rose box and jewelry making supplies in the smaller rose boxes.

I keep my embroidery equipment here.

I keep colorful felt here.

I keep colorful thread in a big jar, in the purple container I keep all my buttons, and a picture of me and my son.

I keep some of my fabric here.

Lastly, the pegboard on the door.

All kinds of scissors!


I keep hand punches, decor tape, duct tape, and paint tape.

I keep clipboard that I painted with chalkboard paint, hand hot glue gun, glue, Mod Podge, Gorilla glue, and other types of glue.

And this is it!!

For tutorials shown in this picture:
Thanks for reading!

s.jpg)
.JPG)


