Thursday, August 1, 2013

DIY: Simple & Crafty Decor


My craft space is finally coming along... I am soooo close to finishing it and I'm so excited! I just love the idea of decorating with items I already have in my craft space. 

Supplies:
  • fabric
  • embroidery hoops
  • buttons
  • thread
  • hot glue gun
  • scissors

I used 3 of my embroidery hoops: 8 in., 6 in., and 4 in.


The first one, I used white fabric and black/blue/pink thread. I sewed it free handed from a picture I had in my craft room originally. I love how it turned out!


The second one was the easiest, I just used scraps of my favorite fabric.


After I finished the first two, I cut the fabric and hot glued it to the hoop.


The last one, it took some patience... (not too much) Take out your buttons and pick out your favorites! (ones you are willing to part with for your decor)


For the third one, I used burlap and white fabric. I arranged the buttons where I wanted. The objective is to make a heart with the buttons. (I tried)


After you arranged them, a button at a time, start to hot glue them where you first placed them.


Lasty, cut the excess fabric/burlap and hot glue it to the hoop.


And, done!


Thanks for reading!


Tuesday, July 16, 2013

DIY: Shabby Chic Office Chair Redo


I've had this chair longer than I can remember, it was all black and the stretchy plastic part of the back of the chair was breaking off. This chair needed a serious redo. I hated everything about that chair! One day I finally did something about it and I absolutely love it now! 

Supplies:
  • (1) yard of cute fabric
  • (1) yard of white fabric
  • (2) white primer spray cans specifically for plastic [*very important*]
  • (2) spray cans [color of choice]
  • (1) staple gun
  • (1) scissors
  • (1) screwdriver


The first thing I did was take apart the chair completely. The seat and the back popped off with little help from my husband (I could have done it :P), my seat had 4 smaller screwed that I needed to undo first, then my hubby helped me pop the plastic off. The next thing I did was spray paint everything. Let it dry in between coats.


While everything is getting dry, cut two pieces of fabric, one is the white that will go under the other piece of fabric for the back and the seat. 


Staple both pieces of fabric around the back/seat. (I left the original black fabric on both.) After you are finished, cut off the excess fabric with scissors.


After everything is dry, grab both the seat and the back pieces and pop them back. Assemble it back together and you are done!


Good luck! Thanks for reading. :)


Friday, July 12, 2013

DIY: Easy Ruler Clip Art Holder


A while ago I decided I wanted to create an arts and craft space for my creative toddler in my office/craft space. Well, I finally got some time to make it happen! I will sharing that space in a different post because it is not quite finished it. I have to finish it before I post about it.... :) Well, anyway.... I had a pinned a pin on pinterest about a cute way of displaying art from a post on ana-white.com. I pinned and never looked back, until recently. I wanted to show you all my results and now easy it was! I basically used all of Ana's idea and changed it a bit. I think my way is a bit easier and in my opinion cuter!

Supplies:

  • (1) yard stick
  • (1) pack of wood clothespins
  • (1) set of acrylic paint
  • (1) hot glue gun
  • (2) wood nails
  • (1) hammer

The first thing I did was measure the wall where I wanted to put the ruler. The space I'm using for my son is in the corner and it was around 30 inches so I had to saw off a couple of inches off the yardstick for it to fit on my wall. If you are putting this in a space longer than a yard, you can skip this step.


Next, measure where you want to put the clothespins on the ruler. I put my first pin on the middle of inch 2, the rest I put them 3 inches apart, and the last one was on the middle of inch 26 (remember my ruler is only 28 inches). I used 9 clothespins on my project. After you have all that information, gather your supplies to paint your clothespins. I used normal size wood clothespins. I couldn't find the jumbo clothes pins that Ana used on hers, but it's okay... I actually like the smaller ones better. :)


Then, take apart the clothespins you are using like I have shown in the picture above. Don't forget to paint the front, the back, and the sides.

I mixed some of the colors around to get extra colors because I only used 6 of colors on my small acrylic set. 

Let it dry.

Put the clothespins back together and use your hot glue to put them on the ruler. I put my clothespins facing down and up so I could put smaller things on the top. Let it sit for a couple of minutes, then nail directly to the wall. And you are done! How cute?!


Thanks for reading!


Sunday, June 16, 2013

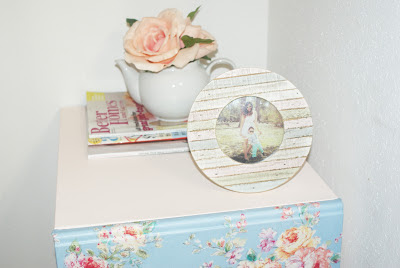
DIY: Shabby Chic File Cabinet Re-do

I love the way my once plain and dull file cabinet turned lively and shabby chic! :)


I could not find a good tutorial on how to start the process of fabric/mod podge on a file cabinet so I decided to post the results I got through trial and error. I had been wanting to purchase a file cabinet for my office but for the prices of $40+ dollars I had almost given up hope. One day, I was shopping in my favorite thrift shop, and there she was, a great condition file cabinet for the price of $6.99! SOLD!


Supplies:
  • (3) Valspar white primer spray paint
  • (1) Valspar Apricot Ice sample color paint
  • (1) yard of fabric
  • (1) Mod podge
  • (1) 2 in. paintbrush
  • (1) scissors
  • (1) iron
  • (1) piece of chalk
  • (4) knobs or (2) handles


The first thing I did was clean out the file cabinet inside and out. After I cleaned it, I went outside and spray painted the file cabinet with the white primer. At first, I did not paint the drawers because I was going to cover them up with fabric, well that was my first mistake. If your file cabinet is not white or tan, paint your drawers white as well. The black bleed through the fabric and it looked horrible. I had to completely remove the fabric, scrape the mod podge off the metal and prime it. It was a mess. It would have saved me a lot of trouble if I would have just primed everything.


I used about 3 of Valspar primer bottles to cover up the file cabinet body and the two drawers. After the body dried, I used a roller brush and painted it with Valspar Apricot Ice color. I'm completely obsessed with that color right now.


The next thing I did was measure the drawers and cut the fabric. The first time I cut the fabric it was too short, so I had to redo it. Try to cut a little more that what you actually need, you can always cut it off later. My measurements were 17 in. wide x 15 in. long. 


Next, grab your iron and try to get rid of most of the wrinkles. I tried to get rid off all mine, but it was impossible and I'm a little impatient.


After I finished ironing both pieces, I grabbed a piece of chalk and laid the fabric down where I would want it to be. I centered the fabric to my preference. Using the chalk, I made a two lines in all 4 corners so I know exactly where to lay the fabric down at. This is really important. It was extremely helpful to me, if I hadn't done that, the fabric would have been not straight or centered. I highly recommend doing this step.


After you made your corner marks, it is time to mod podge! I used a 2 in. paintbrush. It is important to cover the fabric completely and evenly.


This is the hardest part of the whole process for me. Laying the fabric down with mod podge on the drawer and trying to get rid of all the bubbles and stretching to get rid of all the wrinkles. (I could not get any pictures of these steps because I had to do this step extremely fast because I didn't want the glue to dry.)


Cut all the loose thread with scissors.


Seal your fabric in with mod podge on top of the fabric. I did two even coats. Let it dry for a couple of hours


Next, I painted the 4 knobs with the same Valspar Apricot Ice color.


Lastly, make the 4 holes and install the knobs.


And you are done!


Enjoy! Thanks for reading!


Thursday, May 16, 2013

DIY: Toddler Jeans to Shorts - Ombre and Rainbow


I've become obsessed with the ombré effect on clothes so I decided that I should make my son some shorts with the jeans that aren't long enough anymore. My son is a lean toddler who seems to only grows longways. So, with summer around the corner, I decided to make him some shorts of his jeans. I made him one ombré and one rainbow. I must say, I love how both came out! :)

I didn't take any pictures of the process unfortunately but I will try to explain how I got both affects.

Supplies:

  • Jeans
  • Bleach
  • Bucket
  • Tie-dye kit (12 color)
  • Clothes pins
Rainbow Jean

The first thing I did was bleach my sons jeans completely. I did this process outside so we would not inhale any nasty fumes. I filled my bucket roughly halfway, and added around 6 cups of bleach. I made sure to lay the jeans where the water was touching everywhere. I left it there for many (many) hours. I checked it every couple of hours and turned it around as well. The jeans do not need to completely white! You are going to dye every part of it, so it not necessary. Just get it light enough to where the colors would stick. After you get  a light enough color, rinse and throw it in the washer machine and wash. After it is completely dry, I cut my son's jeans into shorts. After you are done getting the right length (I used an old pair of shorts as guide), you can start the dyeing process. 
I used the colors: turquoise, green, yellow, orange, red, and purple. In that exact order. I just followed the instructions on the kit. Let sit for 8 hours, and wash in the washer machine a couple of times.

Ombré Jeans

I used the same process with the bucket and bleach, but instead of laying the jeans completely on the bucket you do parts at a time. I hung the jeans and used clothes clips to hold them in place 2/3 of the way, I left the jeans there for roughly 5 hours, checking them every hour. One it reached my desired color I lifted them and placed them 1/3 of the way to make the lightest part. It finished in a couple of hours. I took it out, rinsed it and washed it.


How cute are my son's rainbow and ombré shorts?! Hope I helped!


Thanks for reading.


Friday, February 22, 2013

DIY: Rainbow Art Invitation/ Creative Birthday Party Photoshoot

This is actually the first time I have ever made my own party invitation and I think I will continue this newly found tradition throughout my son's birthdays. It was just a blast and I just love a complete personalized invitation. I'm going to give a few details on how you can set up your own arty, messy fun photo shoot to create your own personalized invitation. It doesn't have to be a rainbow, it can be any theme you'd like. Have fun making an extremely memorable, fun, and creative birthday party invitation!


Supplies I used:
  • Crayola washable finger paint
  • white all-purpose project paper roll
  • wood stool
  • paint brush
  • Crayola washable paint
  • plastic cover wrap
  • clear packaging tape
  • T-shirts and jeans you don't mind ruining.

First, the most important step. I completely covered the room I was using in plastic, you might want to do this. TRUST ME! It would have been a pain to clean if I hadn't. I got the plastic cover wrap from the paint aisle at Lowes. Then, using the paper roll (I got mine from Hobby Lobby) I taped it on the bookshelf. You can tape the paper to the wall as well. I would make sure it sticks good to the wall because you don't want it to fall when your little one lays their hands on it. I also added paper on the floor for some toe paintin' fun! :)


Next, grab some paint, and draw the sun and the rainbow (or whatever design you want). Let it dry. I used a stool I got from Walmart for 9.99 in the craft section. Now, bring your kiddo in and capture some precious moments! :)


After you captured the perfect picture that will go on the invitation. Let the fun begin! I let my son go wild with the paint. He seriously had a blast. I think I had more fun that he did watching him play.


Mommy and Daddy joined the fun!


There you go!! That is all. :)

Instagram: IssamarSellene
After the photo-shoot.

Ready for the invitations to be sent out!

Thanks for reading!


Related Posts Plugin for WordPress, Blogger...