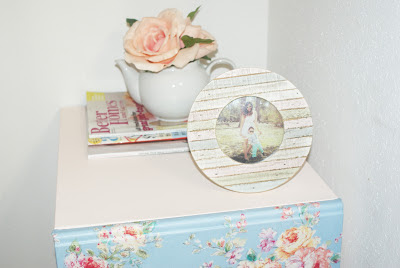
I love the way my once plain and dull file cabinet turned lively and shabby chic! :)
I could not find a good tutorial on how to start the process of fabric/mod podge on a file cabinet so I decided to post the results I got through trial and error. I had been wanting to purchase a file cabinet for my office but for the prices of $40+ dollars I had almost given up hope. One day, I was shopping in my favorite thrift shop, and there she was, a great condition file cabinet for the price of $6.99! SOLD!
Supplies:
- (3) Valspar white primer spray paint
- (1) Valspar Apricot Ice sample color paint
- (1) yard of fabric
- (1) Mod podge
- (1) 2 in. paintbrush
- (1) scissors
- (1) iron
- (1) piece of chalk
- (4) knobs or (2) handles
The first thing I did was clean out the file cabinet inside and out. After I cleaned it, I went outside and spray painted the file cabinet with the white primer. At first, I did not paint the drawers because I was going to cover them up with fabric, well that was my first mistake. If your file cabinet is not white or tan, paint your drawers white as well. The black bleed through the fabric and it looked horrible. I had to completely remove the fabric, scrape the mod podge off the metal and prime it. It was a mess. It would have saved me a lot of trouble if I would have just primed everything.
I used about 3 of Valspar primer bottles to cover up the file cabinet body and the two drawers. After the body dried, I used a roller brush and painted it with Valspar Apricot Ice color. I'm completely obsessed with that color right now.
The next thing I did was measure the drawers and cut the fabric. The first time I cut the fabric it was too short, so I had to redo it. Try to cut a little more that what you actually need, you can always cut it off later. My measurements were 17 in. wide x 15 in. long.
Next, grab your iron and try to get rid of most of the wrinkles. I tried to get rid off all mine, but it was impossible and I'm a little impatient.
After I finished ironing both pieces, I grabbed a piece of chalk and laid the fabric down where I would want it to be. I centered the fabric to my preference. Using the chalk, I made a two lines in all 4 corners so I know exactly where to lay the fabric down at. This is really important. It was extremely helpful to me, if I hadn't done that, the fabric would have been not straight or centered. I highly recommend doing this step.
After you made your corner marks, it is time to mod podge! I used a 2 in. paintbrush. It is important to cover the fabric completely and evenly.
This is the hardest part of the whole process for me. Laying the fabric down with mod podge on the drawer and trying to get rid of all the bubbles and stretching to get rid of all the wrinkles. (I could not get any pictures of these steps because I had to do this step extremely fast because I didn't want the glue to dry.)
Cut all the loose thread with scissors.
Seal your fabric in with mod podge on top of the fabric. I did two even coats. Let it dry for a couple of hours
Next, I painted the 4 knobs with the same Valspar Apricot Ice color.
Lastly, make the 4 holes and install the knobs.
And you are done!


Awesome Pink DIY shabby chic how to make guide:)
ReplyDeleteThanks! :)
DeleteI love this! Thanx so much for sharing!
ReplyDeleteYou are very welcome! Thanks for reading.
Deletelove it !
ReplyDeleteI'm glad! Thanks for reading.
DeleteThis is lovely ... & thanks for sharing your mistake by not painting the drawers as well. The mistakes are almost more valuable to know about than the 'how to', so thanks so much for sharing your experiences. Keep up the great work ... Cheers & thanks, Wendy from Oz ... :)
ReplyDelete