
A while ago I decided I wanted to create an arts and craft space for my creative toddler in my office/craft space. Well, I finally got some time to make it happen! I will sharing that space in a different post because it is not quite finished it. I have to finish it before I post about it.... :) Well, anyway.... I had a pinned a pin on pinterest about a cute way of displaying art from a post on ana-white.com. I pinned and never looked back, until recently. I wanted to show you all my results and now easy it was! I basically used all of Ana's idea and changed it a bit. I think my way is a bit easier and in my opinion cuter!
Supplies:
- (1) yard stick
- (1) pack of wood clothespins
- (1) set of acrylic paint
- (1) hot glue gun
- (2) wood nails
- (1) hammer
The first thing I did was measure the wall where I wanted to put the ruler. The space I'm using for my son is in the corner and it was around 30 inches so I had to saw off a couple of inches off the yardstick for it to fit on my wall. If you are putting this in a space longer than a yard, you can skip this step.

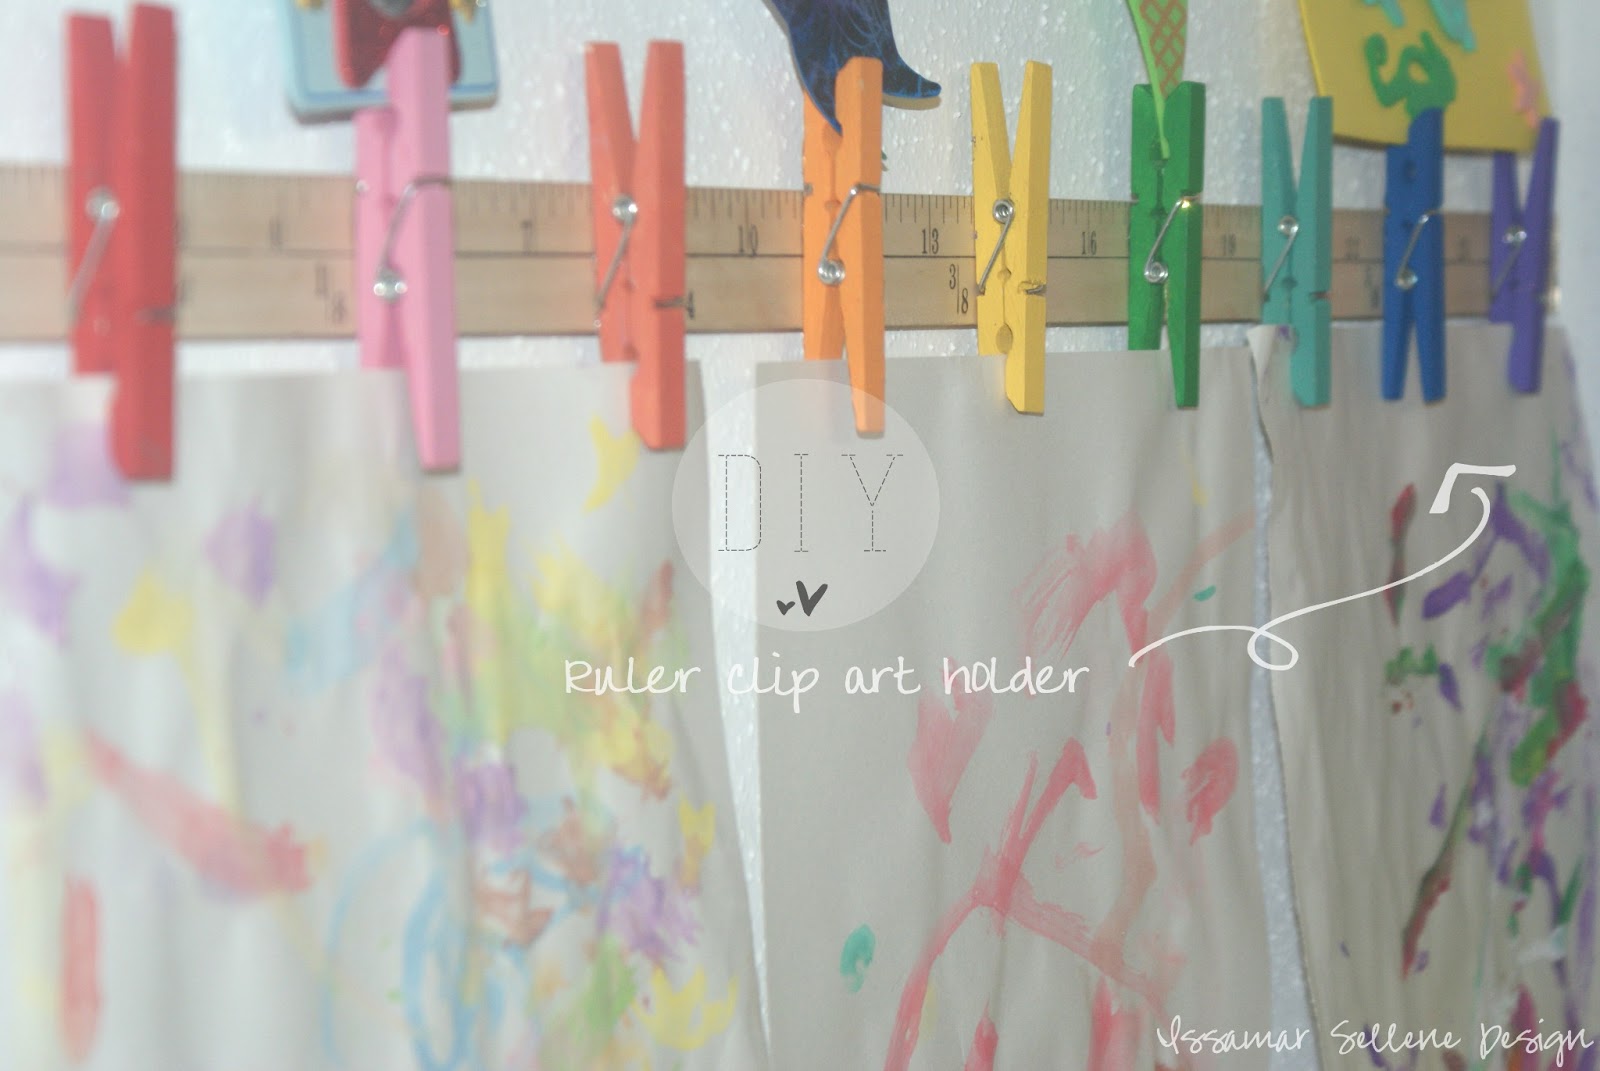
Next, measure where you want to put the clothespins on the ruler. I put my first pin on the middle of inch 2, the rest I put them 3 inches apart, and the last one was on the middle of inch 26 (remember my ruler is only 28 inches). I used 9 clothespins on my project. After you have all that information, gather your supplies to paint your clothespins. I used normal size wood clothespins. I couldn't find the jumbo clothes pins that Ana used on hers, but it's okay... I actually like the smaller ones better. :)

Then, take apart the clothespins you are using like I have shown in the picture above. Don't forget to paint the front, the back, and the sides.
I mixed some of the colors around to get extra colors because I only used 6 of colors on my small acrylic set.
Let it dry.
Put the clothespins back together and use your hot glue to put them on the ruler. I put my clothespins facing down and up so I could put smaller things on the top. Let it sit for a couple of minutes, then nail directly to the wall. And you are done! How cute?!

Thanks for reading!


No comments:
Post a Comment